
This week we're diving into the world of GUI development with Tkinter. In this post we're going to be talking about geometry managers, and the pack geometry manager in particular. Tkinter actually has several different geometry managers that we're going to be looking at in subsequent posts.
What's Tkinter?
First things first, I'm sure some of you are wondering what on Earth this Tkinter thing is. Tkinter (tee-kay-in-ter) is a toolkit for creating graphical user interfaces with Python. It's by no means the only one available, and we also have options like Kivy or PyQt. Tkinter is, however, something of a default option for creating GUIs with Python, and actually comes with most Python installations.
You can check for yourself by opening a Python shell and typing:
import tkinter
If you don't get an error, you're good to go. For those of you still using Python 2, you need to use this import instead:
import Tkinter
We'll be focusing on Python 3 in this article.
If you're brand new to Tkinter, we have an introductory section in our Complete Python Course to get you started.
What's a geometry manager?
When we go about creating a GUI with Tkinter, we start with a window, or multiple windows, and inside this windows live a number of widgets. A widget is something like a component. Together these widgets, or components, make up our complete application. We might have buttons, and containers, text areas, and menus. These are all widgets.
The geometry managers are responsible for controlling how these widgets fit into our application windows, and where these widgets are ultimately placed.
As I mentioned at the start of this post, Tkinter has a number of geometry managers which behave in different ways. Here we'll be focusing on the pack geometry manager, which is really best for simpler applications, where the interface isn't particularly complicated.
While pack is quite easy to get started with, it can sometimes be quite difficult to visualise how elements are going to fit together, which is why we probably wouldn't use it for a complex interface.
Without further ado, let's start using pack.
Basic packing
For the rest of the post we're going to be focusing on a simple example: a fixed size window containing two or so rectangles. It's not going to be terribly pretty, but it should make it quite easy to see what's going on.
To start, let's just import tkinter and get our window set up:
import tkinter as tk

root = tk.Tk()
root.geometry("600x400")

root.mainloop()
The code here is really all boilerplate, and not something we need to be particularly concerned with. We've created a new Tk object and assigned it to root. This is our main application window. We then set the size of that window using the geometry method, specifying a width of 600px and a height of 400px.
We then have this mainloop method at the bottom, which is a how Tkinter monitors things inside our application. We need to call this method to create the application window on the screen.
With all this done, we have a terribly exciting box, which looks like this:
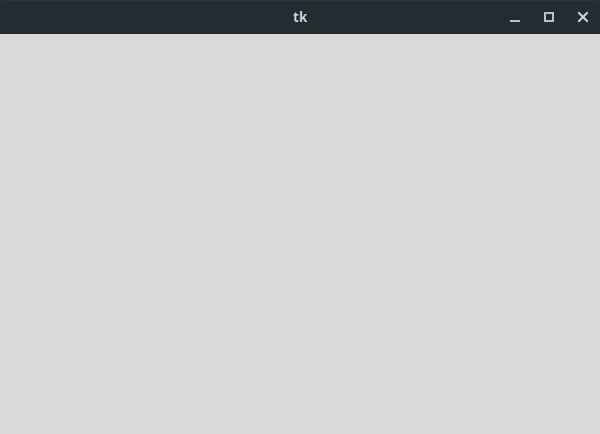
Note that if you're following along, you may see something slightly different. The windows we create using Tkinter have different appearances depending on which operating system we use. What we see above is we get on Solus Linux, but if you're using anything else, it will almost certainly look different.
Okay, so let's get our rectangles in the application window!
In order to do this, we first define a widget for each of the rectangles. Widgets are all Tkinter objects, and there are many to choose from. We're just going to be using Label widgets here.
import tkinter as tk

root = tk.Tk()
root.geometry("600x400")

rectangle_1 = tk.Label(root, text="Rectangle 1", bg="green", fg="white")
rectangle_2 = tk.Label(root, text="Rectangle 2", bg="red", fg="white")

root.mainloop()
We've set a number of properties on our rectangles, and we've also passed in a reference to this root object. By passing in root, we're telling Tkinter that the parent of this widget is the main application window. In other words, these rectangles live directly inside it.
The properties that we set are text, bg, and fg. bg and fg mean background and foreground respectively, and they take care of the background colour, and the text colour in this case. They're not necessary, but it will be useful for us to see where the widgets actually are when we start messing with pack.
Speaking of pack, it's currently nowhere to be seen. Also, if we try to run the application, we still get out empty window.
While we've created the two rectangle widgets, they don't show up in the application window until we specify some geometry manager for them. There's no information about how they fit into the application window, so Tkinter does nothing with them.
We can fix this by calling the pack method on both objects, like so:
import tkinter as tk

root = tk.Tk()
root.geometry("600x400")

rectangle_1 = tk.Label(root, text="Rectangle 1", bg="green", fg="white")
rectangle_1.pack(ipadx=10, ipady=10)

rectangle_2 = tk.Label(root, text="Rectangle 2", bg="red", fg="white")
rectangle_2.pack(ipadx=10, ipady=10)

root.mainloop()
The ipax and ipady values we set here are just internal padding. We can get rid of those and everything will work just fine. Adding them just makes it easier to read the text in this case, since it's not going to be touching all sides of the Label.
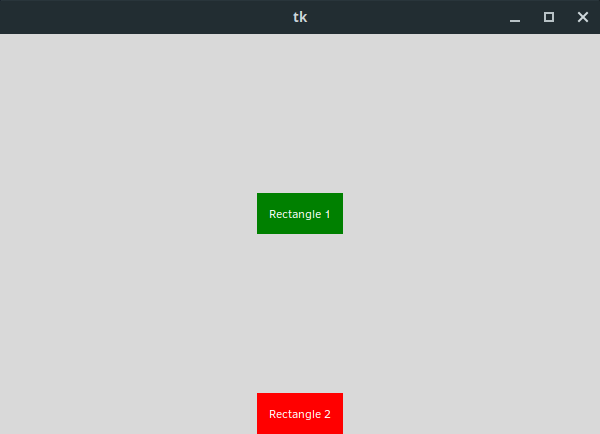
Now, if we run the application again, we finally have something in the application window:
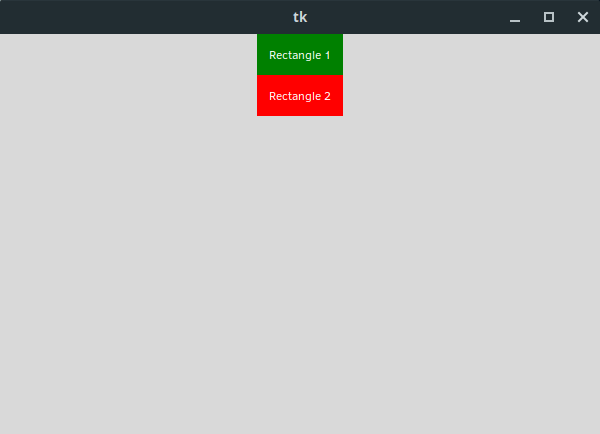
As you can see, pack just piled our rectangle widgets on top of each other. Sometimes that's exactly what we want, but we can be a little more nuanced than this. Let's take a look at what we can do to configure pack.
Configuring pack
Setting pieces of configuration for pack is just a case of adding keyword arguments and values to the pack method. We already saw an example of this with ipadx and ipady, but there are many more options that we can use.
In particular, I'm concerned with three pieces of configuration: fill, side, and expand.
The documentation for these options is quite confusing, so I think it's best we look at a number of examples. Let's start by specifying some values for fill.
Using fill
fill accepts three different values as options: x, y, and both. These options represent axes, so we can tell a given widget to fill the available space along the x-axis, y-axis, or both axes.
Let's try fill="x" first:
import tkinter as tk

root = tk.Tk()
root.geometry("600x400")

rectangle_1 = tk.Label(root, text="Rectangle 1", bg="green", fg="white")
rectangle_1.pack(ipadx=10, ipady=10, fill="x")

rectangle_2 = tk.Label(root, text="Rectangle 2", bg="red", fg="white")
rectangle_2.pack(ipadx=10, ipady=10)

root.mainloop()
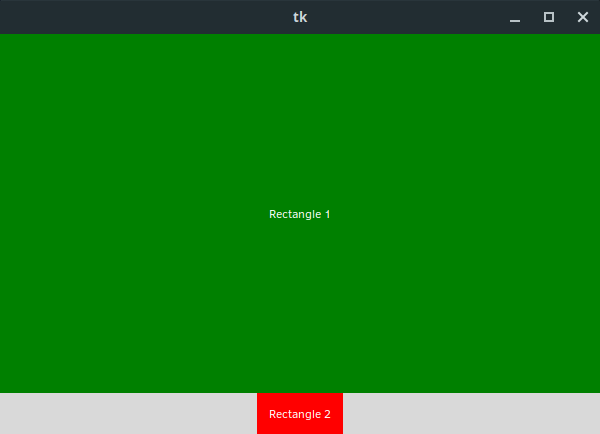
Here we specified that rectangle_1 should fill all of the available space along the x-axis.
If we run our application, we get something like this:
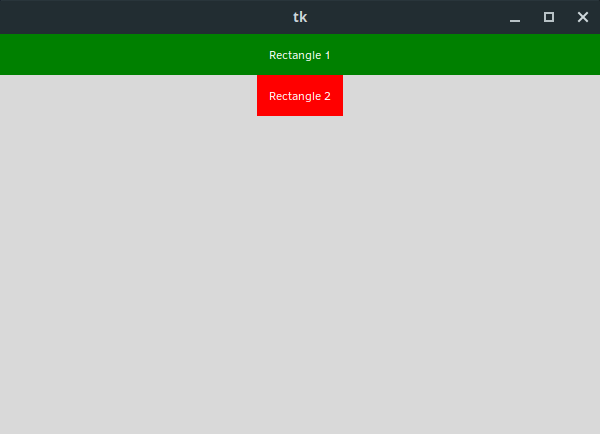
This seems to make sense, but if we specify fill="y" instead, we get something weird:

If we specify fill="both", we get rectangle_1 filling the horizontal space again, but we get no vertical growth in this case either. So what's going on here?
The issue is that as far as Tkinter and pack are concerned, there is no available space for rectangle_1 to grow into along the y-axis. That might seem a little weird considering the abundance of space underneath rectangle_2, but we're actually talking about different things.
Both rectangles have been allocated space in the application window. Each widget has been allocated an area equal to its height, that stretches across the entire width of the application window. Both rectangles are horizontally centred in that area in the image above.
When we set the fill property for these widgets, the area that each widget can fill is constrained by the area they were allocated.
As we can see, our widgets already consume all of the vertical space in that little row they were assigned, so when we tell the widgets to fill in both directions, the only growth we see is horizontal.
This brings us to the expand option, which allows us to overcome this limitation.
Using expand
Whereas fill is used to determine how much of the allocated space a widget consumes, expand is concerned with allocating more space to a given widget.
Let's see what happens when we set expand=True for rectangle_1:
import tkinter as tk

root = tk.Tk()
root.geometry("600x400")

rectangle_1 = tk.Label(root, text="Rectangle 1", bg="green", fg="white")
rectangle_1.pack(ipadx=10, ipady=10, expand=True)

rectangle_2 = tk.Label(root, text="Rectangle 2", bg="red", fg="white")
rectangle_2.pack(ipadx=10, ipady=10)

root.mainloop()
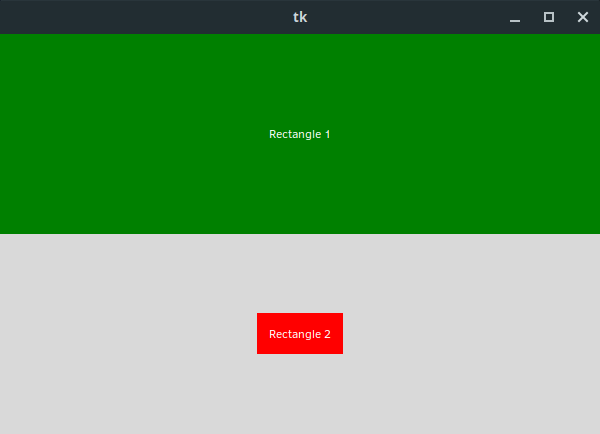
The application now looks like this:
This might seem like an odd result at first, but if we think about it, it makes a lot of sense. Our rectangle_1 widget is not set to fill in either direction, but the widget has now been allocated as much space as there is available in the application window. The only space it hasn't been able to take for itself is the space allocated to rectangle_2.
Because rectangle_1 doesn't fill in either direction, it ends up floating in the middle of this giant area it's been allocated.
If we were to set the fill property on rectangle_1 to both, we'd now see it fill up most of the screen like this:
One thing we still need to check, is what happens when both items are allowed to take more space for themselves?
import tkinter as tk

root = tk.Tk()
root.geometry("600x400")

rectangle_1 = tk.Label(root, text="Rectangle 1", bg="green", fg="white")
rectangle_1.pack(ipadx=10, ipady=10, expand=True, fill="both")

rectangle_2 = tk.Label(root, text="Rectangle 2", bg="red", fg="white")
rectangle_2.pack(ipadx=10, ipady=10, expand=True)

root.mainloop()
Here the green rectangle_1 widget is set to both expand, and fill the entire allocated area. The red rectangle_2 is set to expand, but doesn't have any fill configuration.
What we end up with is the widgets sharing the excess space evenly, even though the red rectangle_2 doesn't consume all of its allocated space. It ends up floating in the middle, while rectangle_1 fills the entire area.
The takeaway here, is that if more than one widget is allowed to expand, the space will be shared among them evenly.
Using side
There's still one more bit of configuration that we haven't yet looked at: side. So what exactly does side do?
Let's take a look:
import tkinter as tk

root = tk.Tk()
root.geometry("600x400")

rectangle_1 = tk.Label(root, text="Rectangle 1", bg="green", fg="white")
rectangle_1.pack(ipadx=10, ipady=10, side="left", expand=True, fill="both")

rectangle_2 = tk.Label(root, text="Rectangle 2", bg="red", fg="white")
rectangle_2.pack(ipadx=10, ipady=10, expand=True, fill="both")

root.mainloop()
Here, both of our widgets are set to both expand and fill the entire allocated space, but rectangle_1 now has an additional bit of configuration: side="left".
Let's look at how that affected our application:
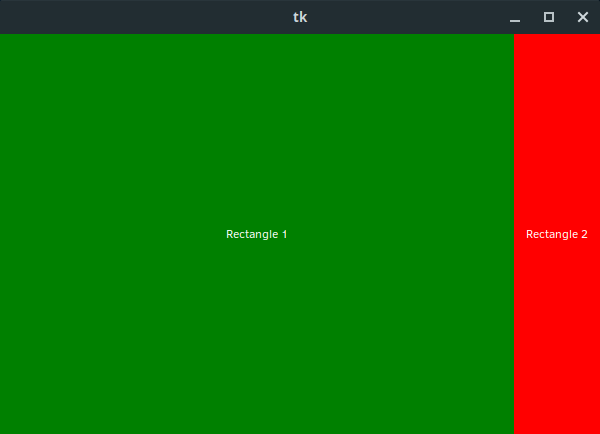
Wow! What happened to sharing the space evenly?
We can see that expand=True did work for the red rectangle_2 widget, as it filled the space vertically, but things still didn't play out quite how we expected.
As it turns out, we need to expand our definition for how expand actually works. Yes, widgets do share the available space evenly when both are set to expand=True, but this is limited to situations where they share an anchor side. By default, widgets are anchored to the top of their parent container (the application window, in our case), but we just set one of our rectangles to use the left side as an anchor instead.
If we set both of our widgets to use side="left", or even if we have one set to side="left" and one set to side="right", things go back to how we expect:
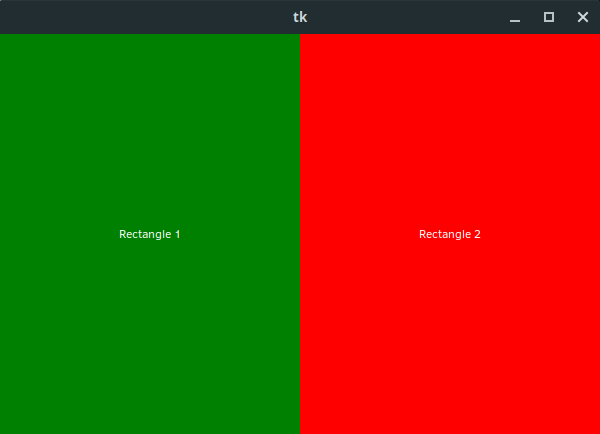
The only visual difference here is that we now split the application left to right, rather than top to bottom.
Looking at how widgets with different side values interact is worth a whole post in itself, so we'll come back to this at a later date. For now, it's enough to know that you're going to get some interesting results.
Wrapping Up
That's it for this post on getting started with pack. Make sure to follow us on Twitter so you don't miss any of our upcoming posts.
If you're interested in a dedicated Tkinter course, we've just released one where we go in depth and cover everything you need to know about Tkinter. Plus, we build a tonne of cool apps as well! Check out the GUI Development with Python and Tkinter course!